First Impressions of the Icom IC-7300 HF + 6M Transceiver

I have been having a great time at Orlando Hamcation that this year features the ARRL National Convention.  One of the highlights was getting a first hand look at the brand new Icom IC-7300.  Icom had a demonstration model on display that was shipped from Japan just for this show.  As far as I know, it’s the one and only IC-7300 on display in the USA at this time.  This radio has generated a lot of interest on the Internet since it was announced.  Many in attendance in the big crowd on Friday made a bee-line for the Icom booth to get a first look at the IC-7300.  FCC approval is pending, and the radio is expected to be in production and available for sale by the end of March, 2016.

Icom IC-7300 At 2016 Orlando Hamcation

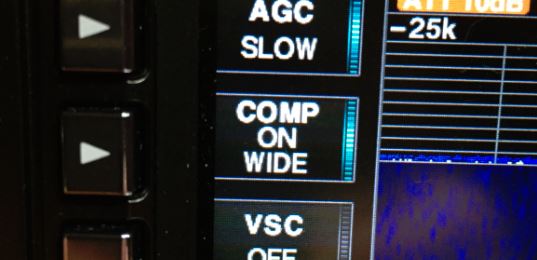
I had a little bit of time at the show to take a look at the radio.  It is the perfect size for a ham shack or a portable operation.  The big 4.3 inch LCD color touch screen is bright, crisp and clear.  The many features of this radio activated by a simple touch of the screen were fast and responsive, and the menus are intuitive and very easy to navigate.  A long press of buttons and certain touch screen functions bring up secondary controls that are also easy to navigate and operate.  This is not a full review, but I found the entire front panel to be well laid out with good ergonomics in mind.

The IC-7300 weighs just under 10 pounds, with dimensions of 9.45 x 3.7 x 9.37 inches.  It includes an SD card slot on the front, and connections for USB, antenna, external tuner (although it has a built in auto tuner), key, ALC, accessory, CI-V, speaker and others.  As I stood and played with the rig, I thought how great it would be on the desk, but also how perfect it would be for portable operation for Field Day, NPOTA, and other similar activities.

Of course, one of the great features of this radio is the big real-time spectrum scope with waterfall.  It also has a great  real-time audio scope.  These scopes look fantastic on the 4.3 inch TFT LCD screen.  One great feature of the scope is the ability to use your finger to touch and tune to a signal displayed on the scope.  This feature is responsive and quick.

Icom in the brochure for the IC-7300 touts the great receiver in this radio.  The specs indicate a RF direct sampling system with 15 discreet band pass filters, with “class leading RMDR and phase noise characteristics”.  Icom also states that the IC-7300 has a new “IP+” function that greatly improves 3rd order intercept performance.  All of the hams I spoke with at the Icom booth were very excited about the potential for this receiver, but there was no signal connected to the radio at the booth to hear how good it really performs.

Fortunately, after the show was completed for the day, Will (AA4WJ) and I were able to take the IC-7300 with us in order to test it out on an antenna.  We did not use the transmit functions on the radio, but were able to test out the receiver at my campsite with a Budipole antenna on 40 meters.  Following are the short videos we took as we listened to the radio and worked through some of its many features and functions.  Unfortunately, time would not permit us to video all of the menus and features, but we hit the highlights.  The audio you hear is from the radio’s internal speaker.  From our quick run through, I came away with the opinion that the receiver lives up to the expectations I have heard from many hams.  I’m very excited about this new addition to the Icom lineup and look forward to having one in the shack.

Enjoy the videos.  A big thanks to Ray Novak, N9JA and Will Jourdain, AA4WJ of Icom America for allowing me to test out this great radio.

73,  Bill, AB4BJ


Audio Settings for the Icom IC-7851 and the Electro-Voice RE27 N/D Microphone

ElectroVoice RE27 and Icom IC-7851

In my initial impressions of the IC-7851, I indicated that setting up the transmit audio settings for use with my Electro-Voice RE27 N/D microphone had not been very difficult and that I was receiving very good audio reports with this combination.  In this post, I’ll explain how I set this up, and include some images.  As I have mentioned in other posts in this blog about audio set up (most recently where I interfaced the RE27 with the TS-990 I used for two years), your mileage may vary depending on your voice characteristics and other factors.  Don’t hesitate to play with these settings and get honest critique from fellow hams on the air.  I’ve found that using the monitor function on any radio never really gives you a true picture of how you sound, so enlist others on the air to help you.  I should also point out that there is no such thing as “one size fits all” when it comes to transmit audio.  The best settings for rag chewing will be a far cry from what works best when you are trying to bust a DX pileup.  So, know your voice and your intended application when setting up your transmit audio.  Tinkering, after all, is at the heart of amateur radio!

While I do work DX from time to time, I spend most of my operating hours talking to fellow hams or checking into nets.  I therefore rarely strive to have the “piercing” audio that some DX operators use.  When I do want to have a bit more punch, I will increase compression, narrow the bandwidth and eliminate bass, but this is the exception to how I normally operate.  This description of my settings is therefore probably not suited for a DX contest or similar application.  I have found that my settings generate very good reports from fellow hams who have told me that I have very “pleasing audio” and that “it sounds like you do in person”.

One more thing before we get into the settings.  Don’t eat your microphone!  A lot of hams believe that they must also touch the mic with their mouths when transmitting.  This can result in distorted audio and an RF burn if you have that problem in your shack, so remember to keep a respectable distance from your mic when transmitting.  I try to be at least two inches back when using my RE27.

I believe that any time you are setting up your transmit audio you must start with the mic gain and the ALC.  In fact, I constantly check to make sure that I am not exceeding the ALC zone on my meter.

IC-7851 ALC Meter
IC-7851 ALC Meter

Adjusting your ALC should be quick and easy.  Using a dummy load talk into your mic and adjust the mic gain so that you do not exceed the red ALC zone.  I have mine adjusted to peak at the end of the zone, but never exceed it.  For me, the mic gain setting is at the center (or twelve o’clock) to achieve this with the RE27.

IC-7851 Mic Gain Control

After your gain is adjusted to peak, but not overdrive, your ALC, move on to the comp setting.  I run with the compression on and adjusted to the center (12 o’clock) position.  Again, your mileage may vary, but I have received very good reports with the compression on at this level.  Try it both ways and see what other hams say about your audio on transmit, but this setting with my mic did not produce any harshness in my transmitted audio.

IC-7851 Compression Indicator

The compression control is at the bottom of the radio.

IC-7851 Compression Control

You may have noticed that the compression indicator, above, also shows your transmit bandwidth (TBW) setting.  I run mine “wide” for this setup, but the 7851 allows you to choose narrow and midrange as well.  You might want to consider narrow for DX pileup work.  The good news is that all three TBW settings are adjustable in the settings for the 7851, so play with these and find the range that makes your audio sound the best.

IC-7851 TBW settings

After you adjust your TBW ranges to suit your operating needs, you will select wide, mid or narrow by holding for 1 second the selector adjacent to the compression/TBW indicator.  By the way, the TBW settings are accessed by pressing “set” (F-7), “level” (F-1) and scrolling down to the SSB TBW area. Once you’ve highlighted the setting you want to change, use the main VFO knob to change your settings.  Pressing DEF (F-4) will always change the settings back to default.

While you are in this part of the menu of the IC-7851, you can tweak the final setting to make your transmit audio sound great.  In addition to your TBW setting, the IC-7851 also has a simple equalizer to allow you to adjust the base and treble of your transmitted audio.  For this setup, I have mine set at Base +2 and Treble +1.  Again, your mileage may vary, but this works well for me with the RE27.

IC-7851 Base and Treble Control

That’s it!  After working on all of these settings and receiving some helpful on-the-air input, I think I have achieved great sounding transmit audio with the IC-7851 and the EV RE27.

Oh, there’s one more thing if you are using the RE27.  Don’t forget that it has it’s own internal settings.  I played with these on the air with a ham friend and the settings shown in the following photo sounded best:

EV RE27 Settings
EV RE27 Settings

I hope this helps some of you get started with adjusting the audio on your IC-7851, but remember – it’s just a starting point!  Good luck and have fun with this truly first class radio.

73,

Bill – AB4BJ

P.S. Please post your experiences, settings, etc. in the comments section below.

Control Head Mounting Solution for the Icom ID-5100

The Icom ID-5100 over the Icom IC-7100 in the ham shack

I’ve been reading a lot of online comments about the mounting options – or lack thereof – for the control head of the Icom ID-5100.  While I tend to agree that it would have been nice for Icom to include the MBA-2 control head, magnets and screws with the radio, I made my purchase knowing these items were not included.  So, given that I proceeded with eyes wide open, I’m not going to rant and rave in this post about what was not provided by Icom.  Instead, I wanted to share my experience in creating a mounting solution for the control head that I use in the ham shack and from time to time in our motorhome as we travel.

The control head for the ID-5100 is very big, so a sturdy mounting option was very important.  I also wanted the ability to move the control head around on my desk, if necessary.  As mentioned, I also wanted a quick and easy way to remove the radio and control head form the ham shack and take it on the road.  As it turns out, I found one solution that will allow me to accomplish all of the above.

At the time I pre-ordered the radio, and after a little research, I decided that I would go ahead and also pre-order the MBA-2 mounting kit.  While most hams could probably arrive at a solution without buying this kit, I decided I wanted to at least use the OEM magnets, screws and mounting plate.  For any of you who have used the ID-880H and the IC-2820, the kit for the ID-5100 is very similar, with the only difference being the larger size of the mounting plate.

The metal mounting plate included with the MBA-2 kit

After receiving my radio and MBA-2 kit, I installed the magnets with the supplied screws.  The metal mounting plate contains raised circular areas that correspond to the location of the magnets on the control head.   These raised areas prevent the control head magnets from slipping on the metal plate, thus providing a secure base for the control head.  Now, what was I going to use to hold the control head on my desk?

I decided that since I probably had enough parts lying around the ham shack it was worth the effort to look and see if I had anything that would work.  As I dug around, I remembered that at the Orlando Hamcation I had purchased a suction cup mounting arm and bean bag base to use with a handie talkie.  After looking around a bit, I found these two items.  Then it was off to see if they would work.

The bean bag base is very generic and does not have a manufacturer name on it anywhere I could find.  It is very similar, if not identical, to the Lido LM-25 that you can find at Ham Radio Outlet.  It appeared to be heavy enough to provide a stable and secure base for the large control head.

The suction cup arm I had was manufactured by Arkon, but there are many variations of this type of mount available.  I have seen several sold by Ham Radio Outlet under the Lido name, and RAM also sells a few.  Importantly, the mounting arm that I had has AMPS pattern holes on a clip-on attachment.  Arkon also sells a version of this arm that is not a “clip-on” version and that just terminates to a plastic plate with the AMPS holes pattern.

As it turned out, the Icom MBA-2 metal mounting plate had hole patterns that worked with the AMPS pattern on the mounting arm I had in the drawer.  In order to allow the MBA-2 metal plate and the plastic mounting surface of the Arkon arm to fit flush together, I used four black wire ties through each hole.  This provided a very sturdy solution without using some type of adhesive to secure the metal plate to the plastic mount.  I wanted to avoid adhesive in the event I ever changed my mind about this mounting solution.  All I have to do is snip the wire ties and the metal mounting plate is as good as new.  NOTE:  The Arkon mount I had was two pieces; a main mounting arm and a small clip-on plastic mounting head that had the AMPS pattern.  To avoid any instability, I used epoxy to adhere the two pieces of the Arkon mounting bracket together.

After completing all of the above, the next step was to adhere the Arkon arm to the bean bag base with the suction cup.  It worked perfectly, but Arkon also provides a disc with 3M adhesive for a more “permanent” solution.   After mounting the suction cup arm to the bean bag base, all that was left was attaching the control head magnets to the metal MBA-2 mounting plate at the end of the suction cup arm.  Viola!  It worked perfectly and provided an adjustable and movable solution on my operating desk.

Shortly after completing this project, we took a motorhome trip and I decided to see how this mounting solution would work on the dash.  I placed the control head and bean bag base on the dash of the motorhome, adjusted the angle with the mounting arm, and it remained in place and very stable for our entire trip.

There are probably as many ways to mount the ID-5100 control head as there are opinions about what “options” should be included with the radio, but I have found this solution to be perfect for my operating needs.

If you are interested in this type of mounting solution, the cost would be approximately $80.  The MBA-2 is available from HRO for $39.95.  The Lido LM-25 bean bag base is around $20 at HRO and the Arkon suction cup arm is less than $20 on the Arkon web site. Lido also sells a suction cup arm/mount, but I’m not sure of the configuration of the mounting holes.   You may also want to check the mounts available from RAM, as they may offer similar solutions.

Good luck with your new ID-5100!

73,

AB4BJ


Mobile Installation of the Icom IC-7100

I’ve had a lot of fun over the last week installing my new Icom IC-7100 in my 2008 Chrysler Aspen SUV.  This new radio from Icom is a great mobile rig, but offers some unique mounting challenges.  After completing my installation for D-Star, VHF, UHF and HF mobile operation of the 7100, I thought I would share my experiences in completing this project.

The 7100 Mounted in the Console of a 2008 Chrysler Aspen


Prior to the 7100, I used an Icom 2820 for mobile D-Star, VHF and UHF and a Yaesu 857D for mobile HF. With these two radios, I used the Comet SBB7 dual band antenna with the Diamond K9000 motorized mount (VHF, UHF, D-Star) and the Little Tarheel II antenna (HF).  The 7100 has replaced both of these radios, but the antennas remain and work very well with the new rig.

So, where did I start?   I decided to begin with the most challenging part of the installation – the 7100’s control head.  This control head is unique in that it is sloped, large and heavier than any mobile control head I have ever installed in a vehicle.  My old control heads (857D and 2820) were mounted up high on the face of the dashboard by the air vent, but I quickly realized that the 7100 could not be mounted in this configuration.

7100 control head mounted in the center console.

Fortunately, I had a compartment in the console in my SUV that was not being used (well, it was a great junk collector), so I decided to see if I could mount the control head at this location.  The dilemma was that while the unit would fit inside the compartment, in this configuration it would be inaccessible for touch screen control or the pressing of buttons.

After giving this some thought and carefully looking at the mounting options for this control head, I realized that the device had a standard ¼ inch thread at the bottom.  This is the same size and type of thread that you would find on most cameras that can be tripod mounted.  Sure enough, a ¼ inch lag bolt I had on the workbench fit this thread perfectly.

Front view of Plexiglas mounting platform for 7100 control head.

Although I found that the control head had a standard ¼ inch thread, this still did not provide me with a clear mounting option in my vehicle’s console compartment.  The answer presented itself in the form of a spare piece of black Plexiglas I had in the garage.  I decided that if I could cut the Plexiglas to form fit the opening of the console compartment; I could mount the control head to the Plexiglas to fit on the console.

Bottom view of Plexiglas mounting platform for 7100 control head.

So, I cut the Plexiglas with a table saw to tightly fit in the opening, made a few clear Plexiglas spacers and mounted the control head to this assembly with the ¼ inch lag bolt.  I then fit the whole thing into the compartment opening and it fit like a glove!  The control head does not move at all when I’m driving, even on bumpy roads!

7100 body under the seat.

After completing this, the most challenging part of the installation, I mounted the radio under the seat of the car and began the time consuming process of running the control head cable, microphone cable, coax and speaker wire.


Icom SP-10 mobile speaker.

A note here about the speaker; the control head has a built in speaker that is great for most applications; however, I already had an Icom SP-10 mobile speaker mounted on the dashboard and decided to use it.  It also serves as a mounting location for my microphone hanger.  Both speakers sound great.


7100 GPS information screen.

The last challenge was to interface a GPS receiver with the 7100.  This is particularly important for D-Star operation as it enables the “Near Repeater” function that allows you to find the closest D-Star repeater to your location just by pressing the touch screen.


Dash mounted Byonics GPS2.
Dash mounted Byonics GPS2.

Fortunately, I already had a Byonics GPS2 that I have used with several other radios, so I mounted this on the dashboard and ran the wire to the back of the main radio body under the seat.  It worked perfectly.

After completing the installation of the 7100 in my vehicle, I tested its operation on D-Star, the local analog FM repeaters and on various HF bands.  I was very pleased with the operation of this radio and so far it has performed flawlessly.

radio4When I first saw the pictures of the 7100, I was skeptical whether it would be a good choice for mobile operation.  This caused me to be somewhat hesitant to install it in my vehicle.  After deciding to take the plunge, I am very glad I did.  This is a fantastic all band/all mode radio for mobile use (and for use in the ham shack), and one I plan to use for a very long time.